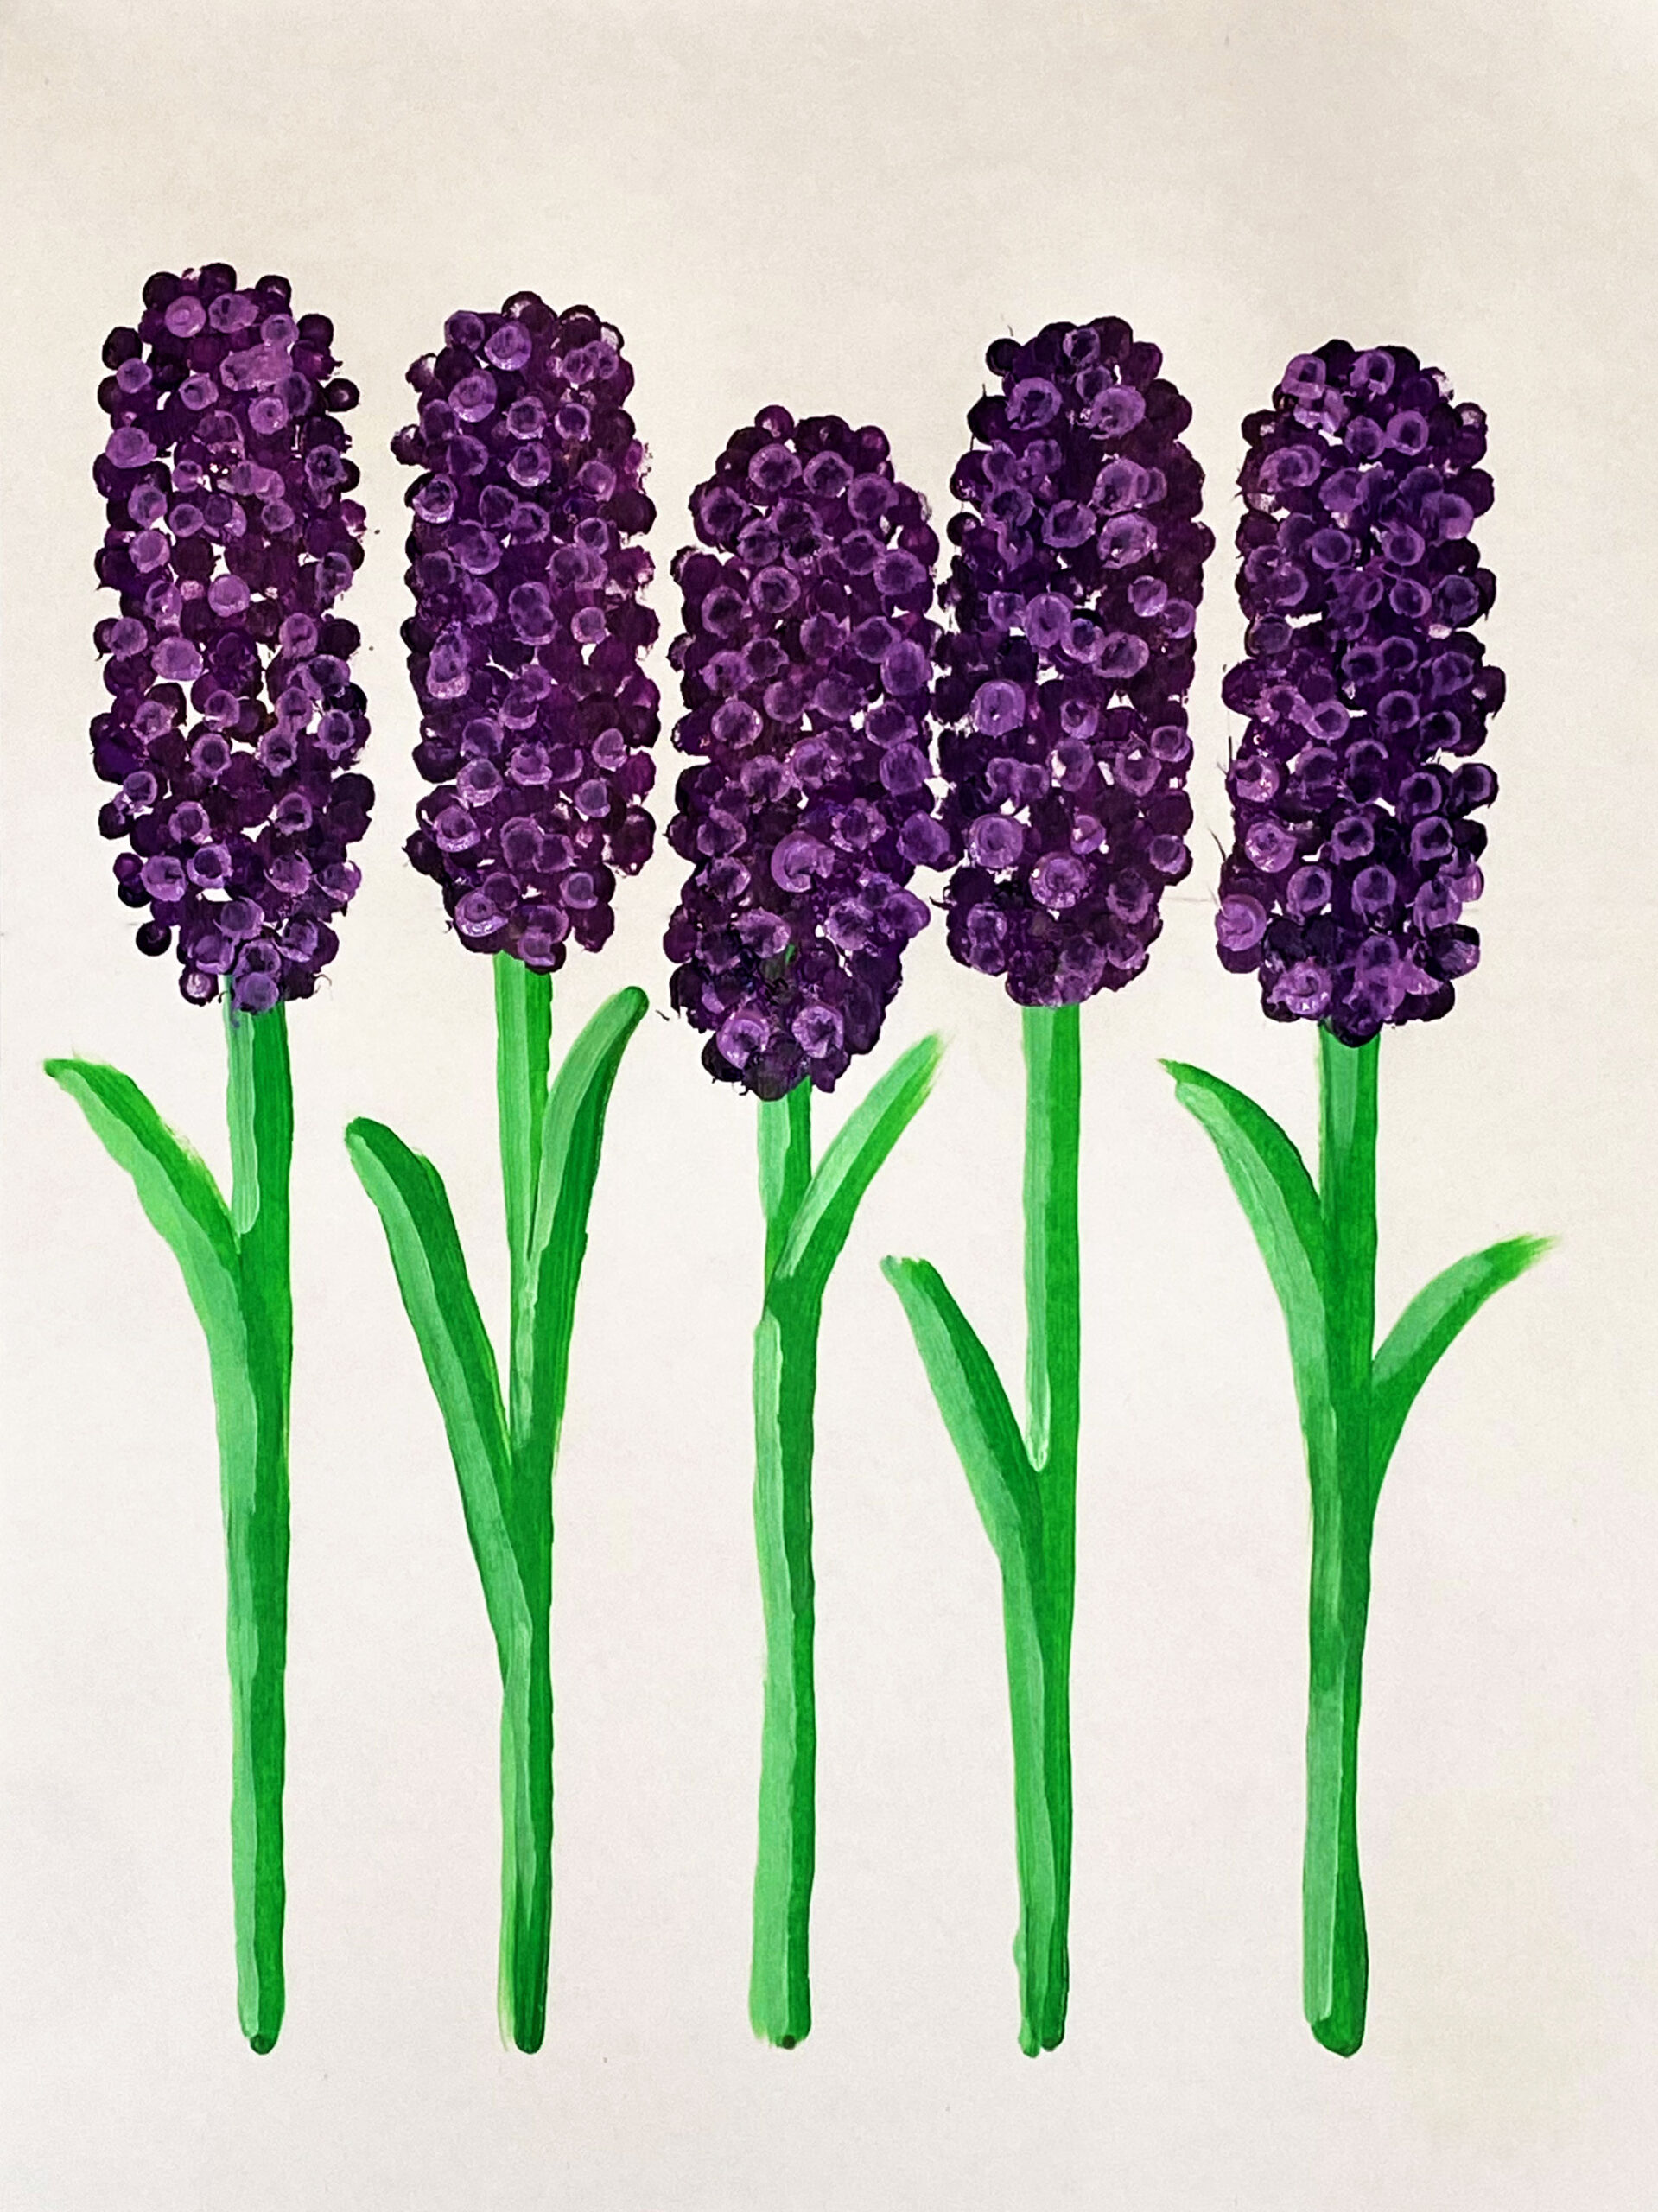
Hyacinth Flowers
Project Objective
Students will learn about tints and shades and how they create highlights, shadows, and depth as they paint hyacinth flowers.
Required Materials
Age Group
Resources


A great lesson for late winter/early spring. It’s also a good time for a refresher on proper paint brush care. You can mix all the colors ahead of class if you’re short on time (or for lower grades).
- Draw helper lines
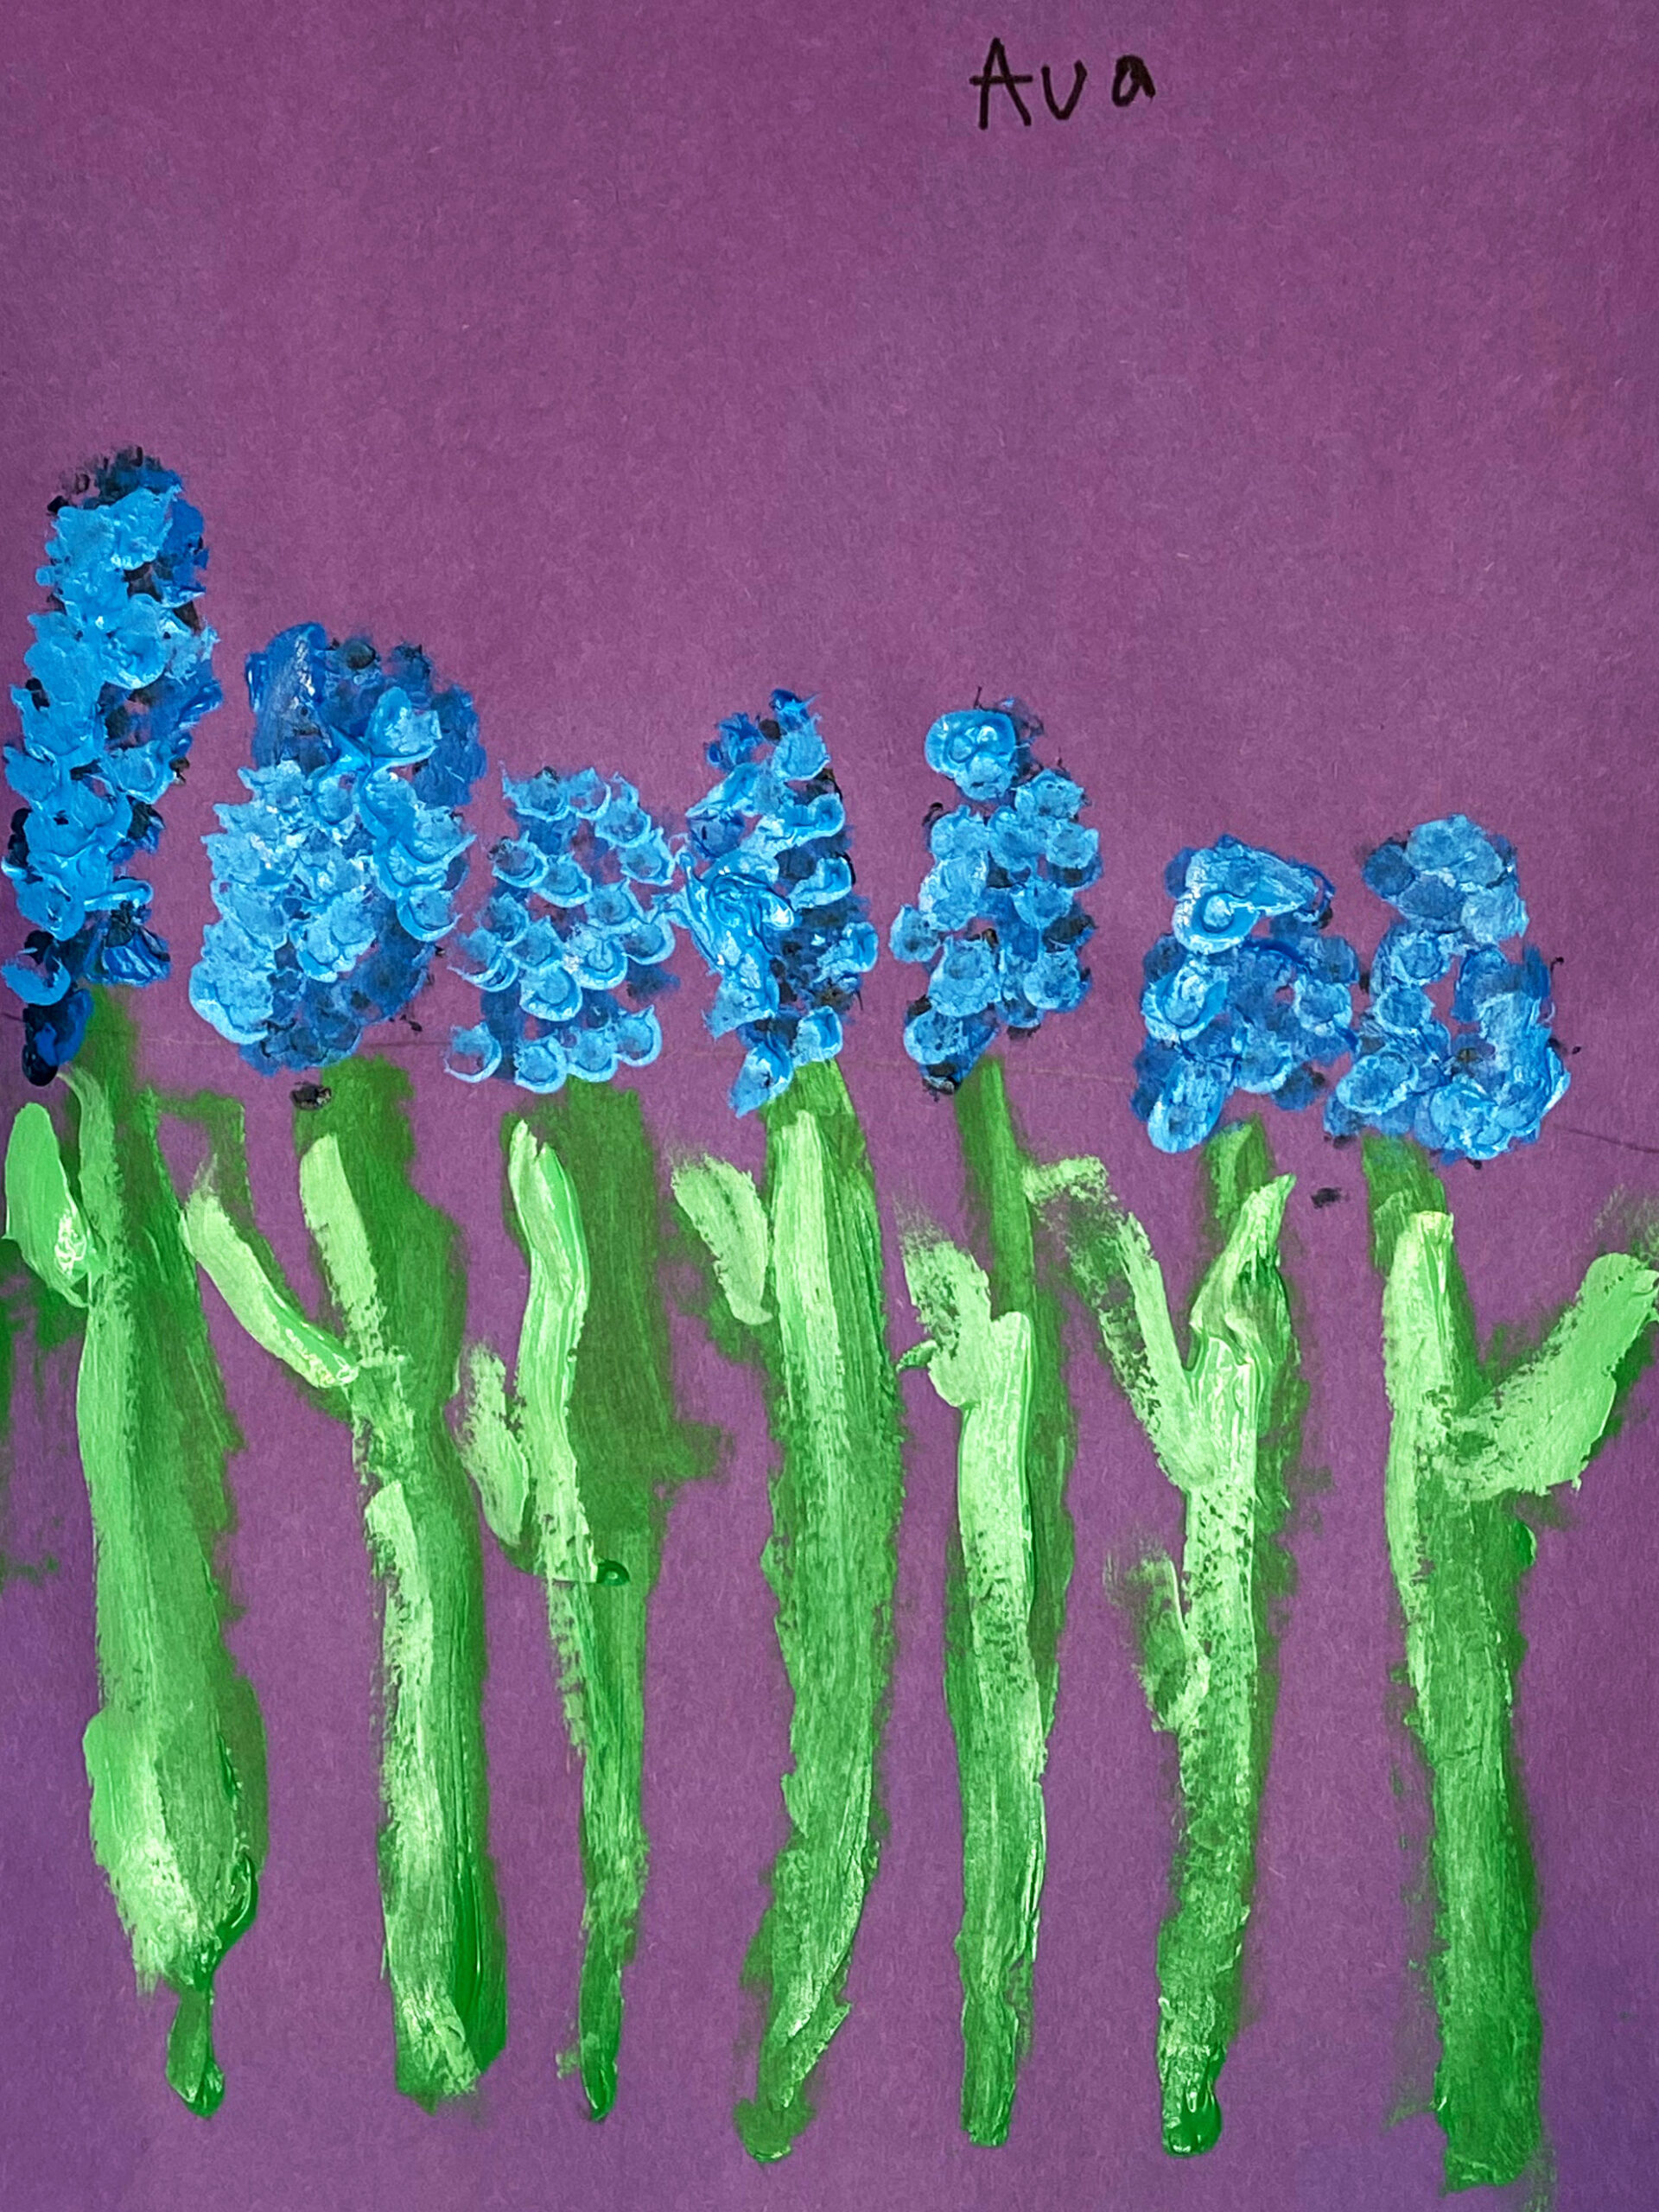
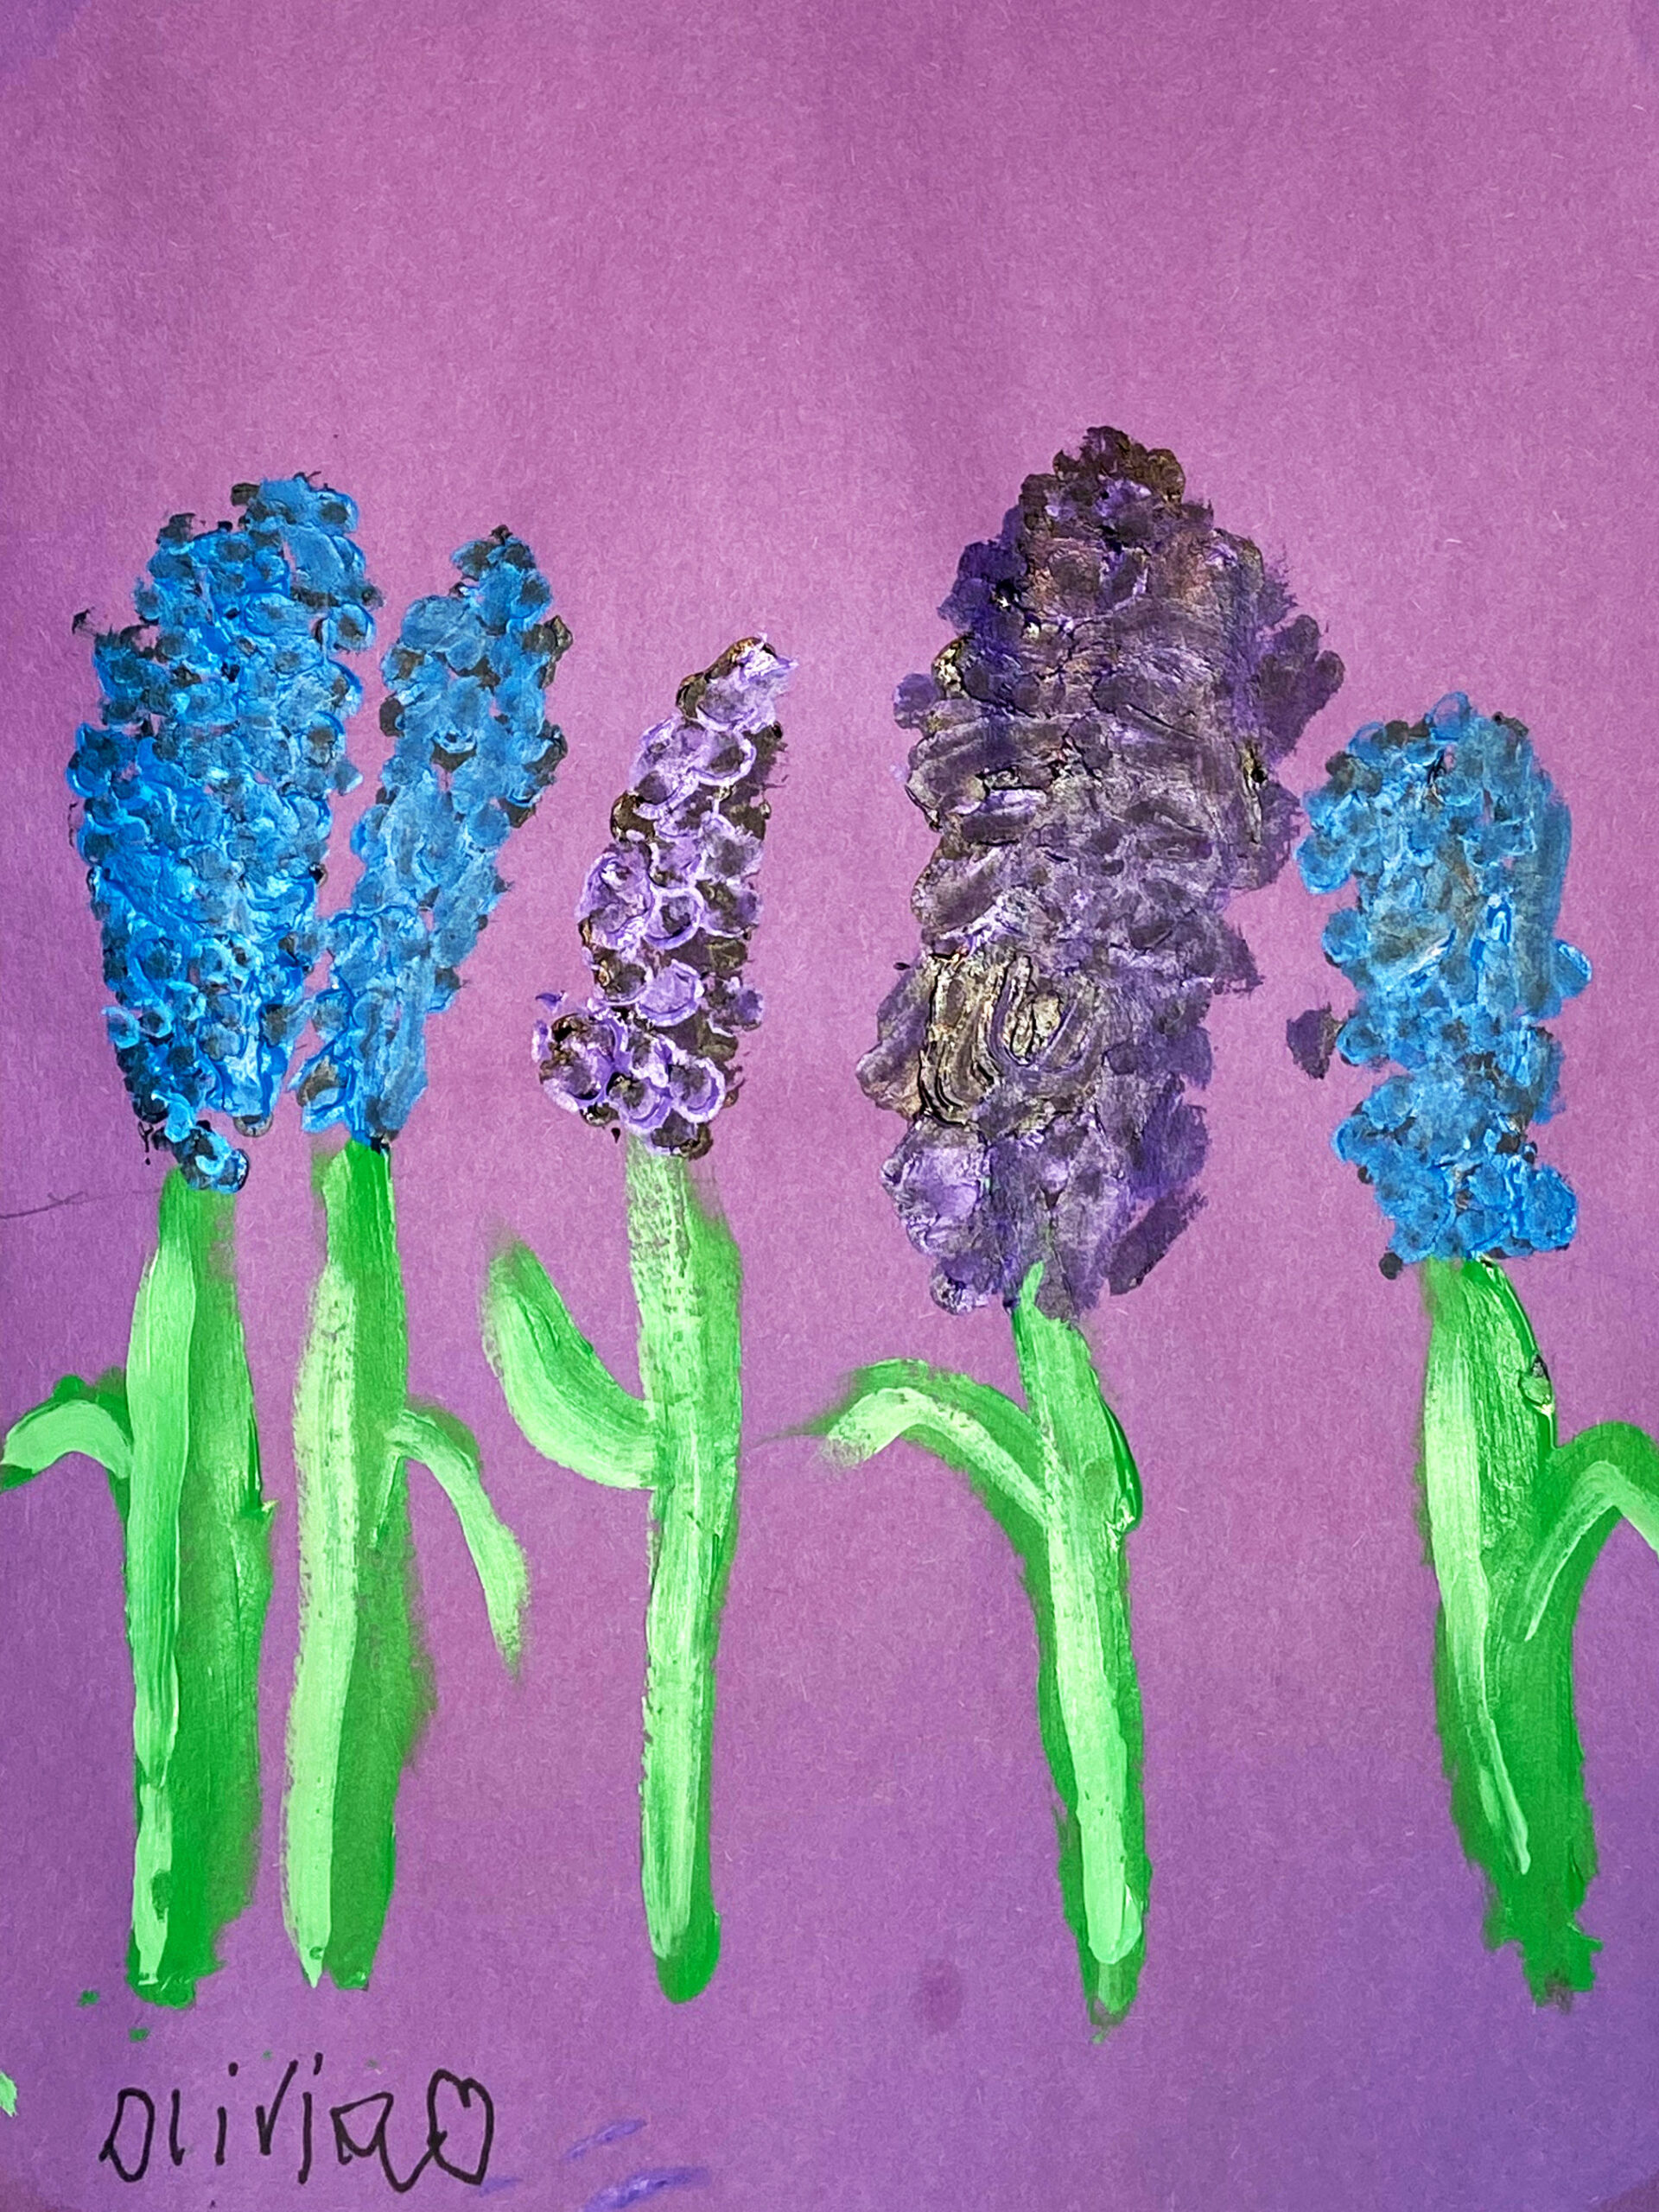
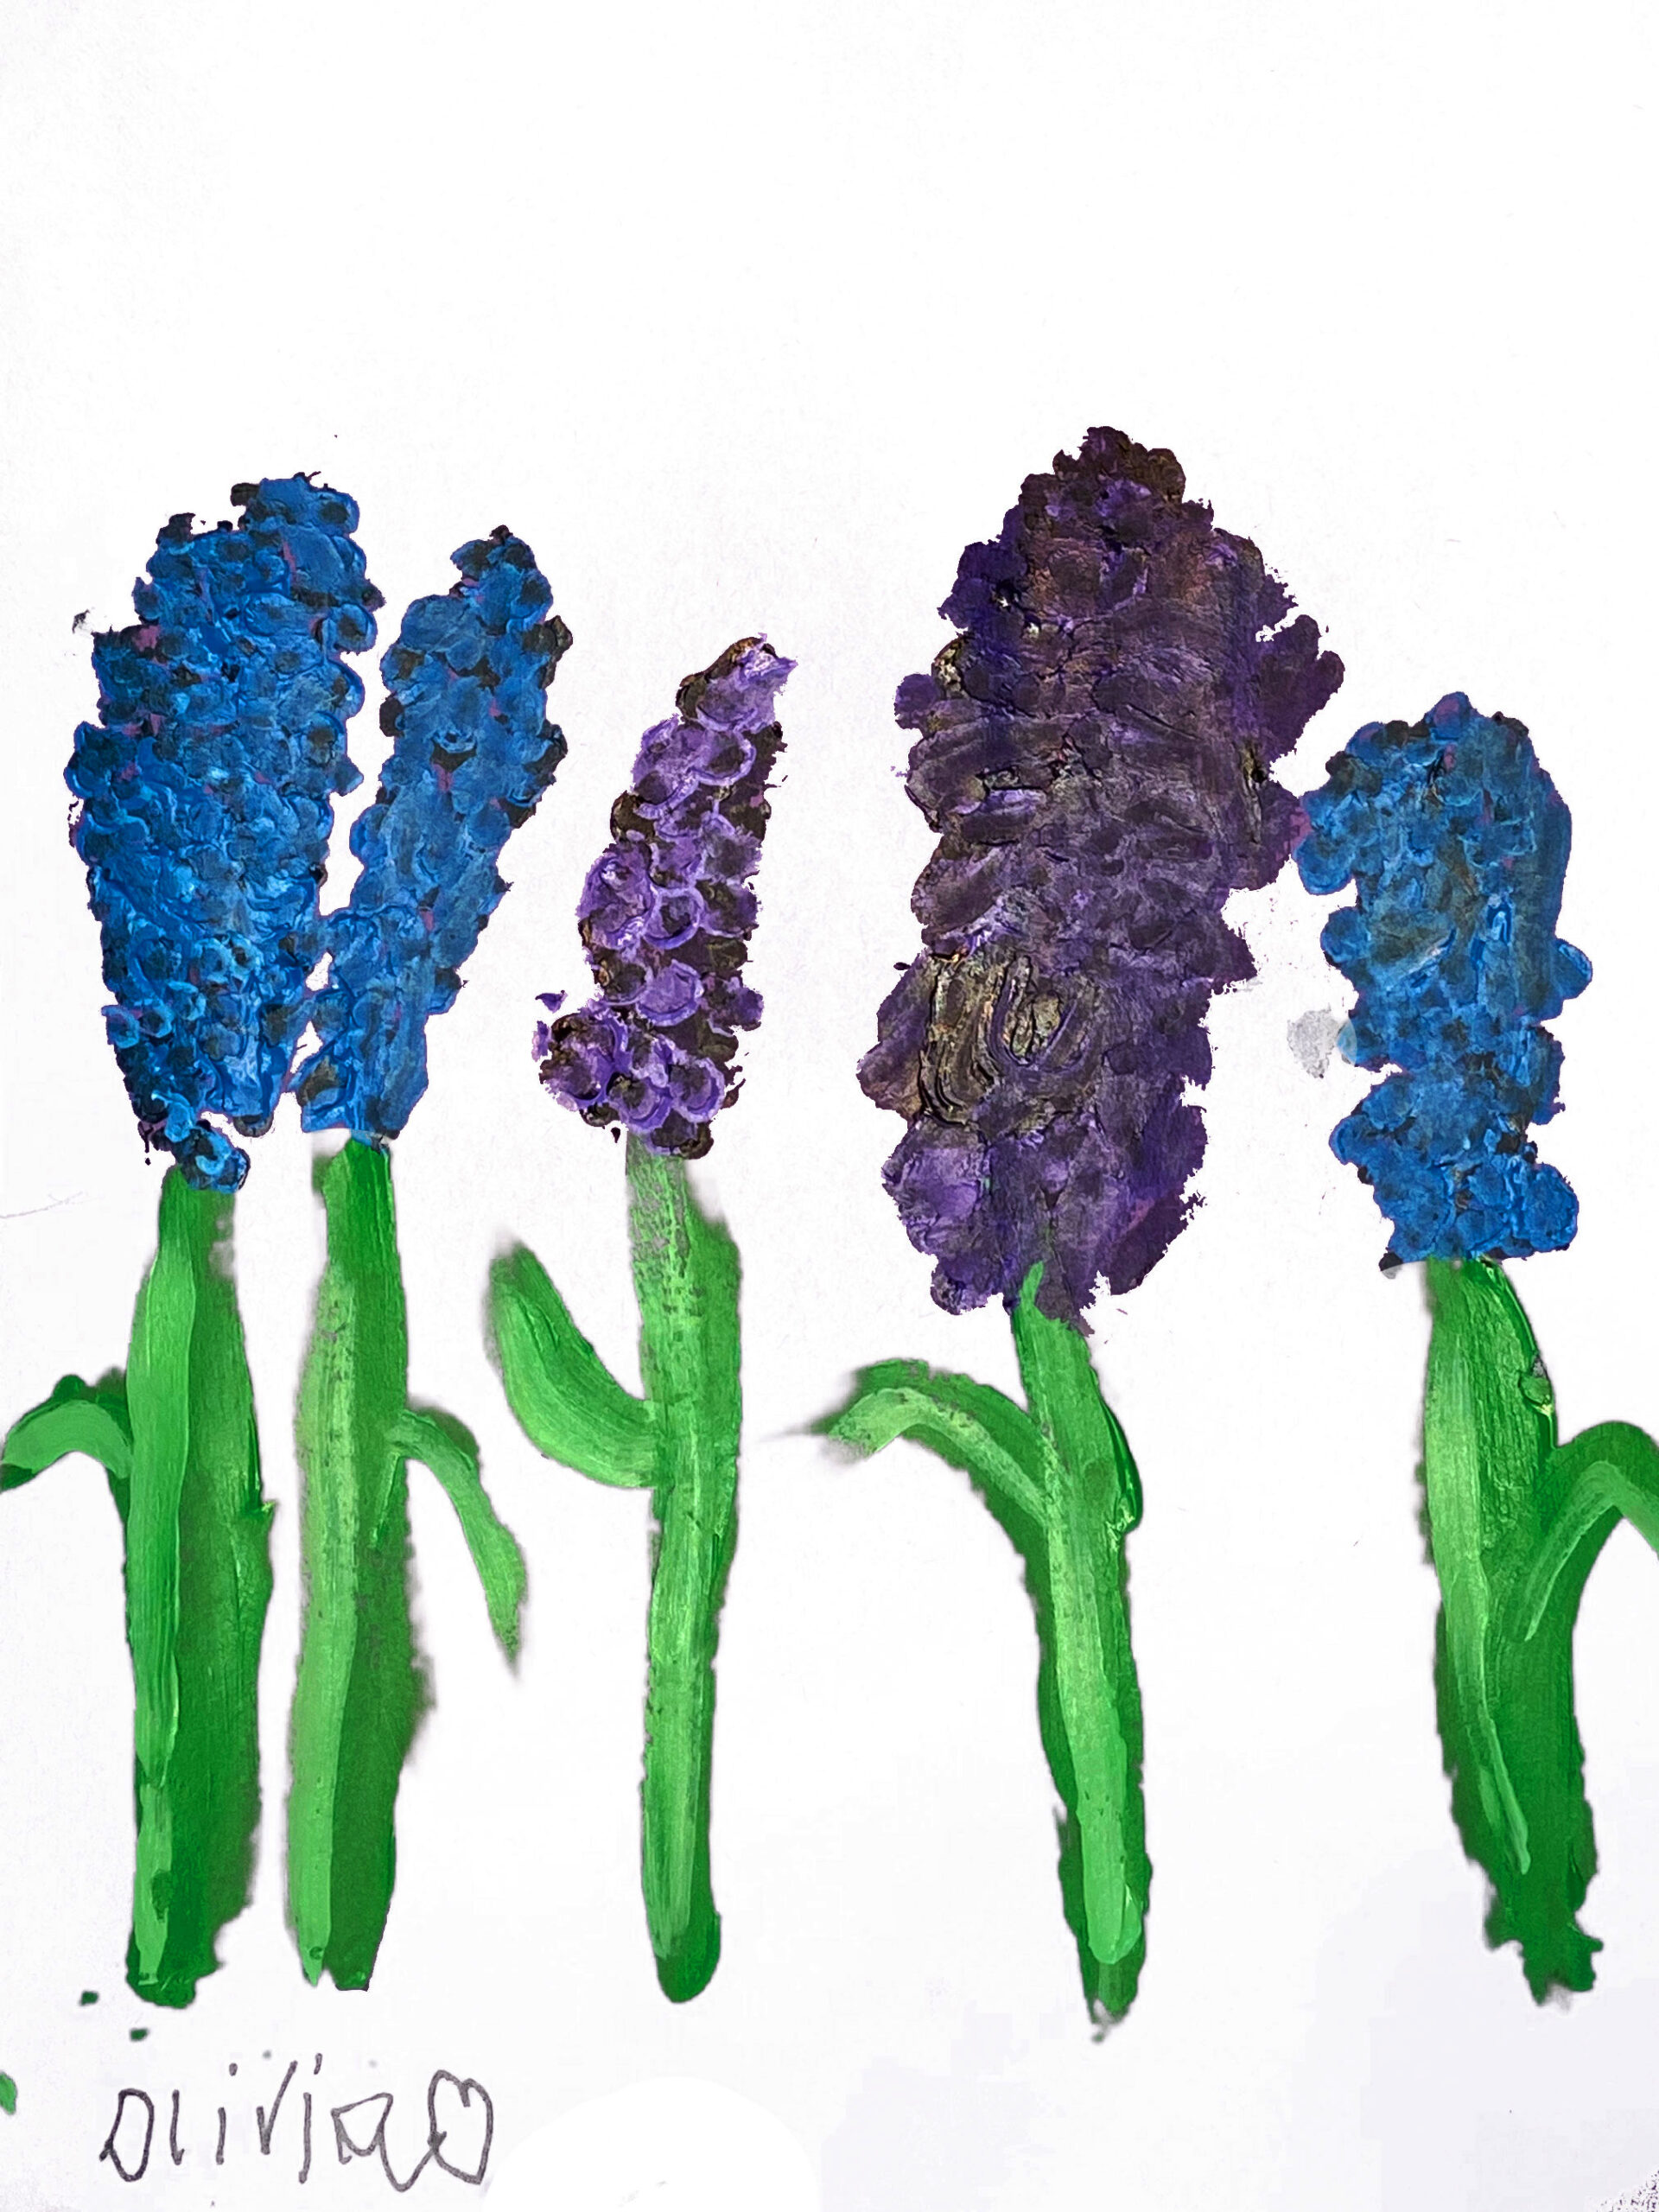
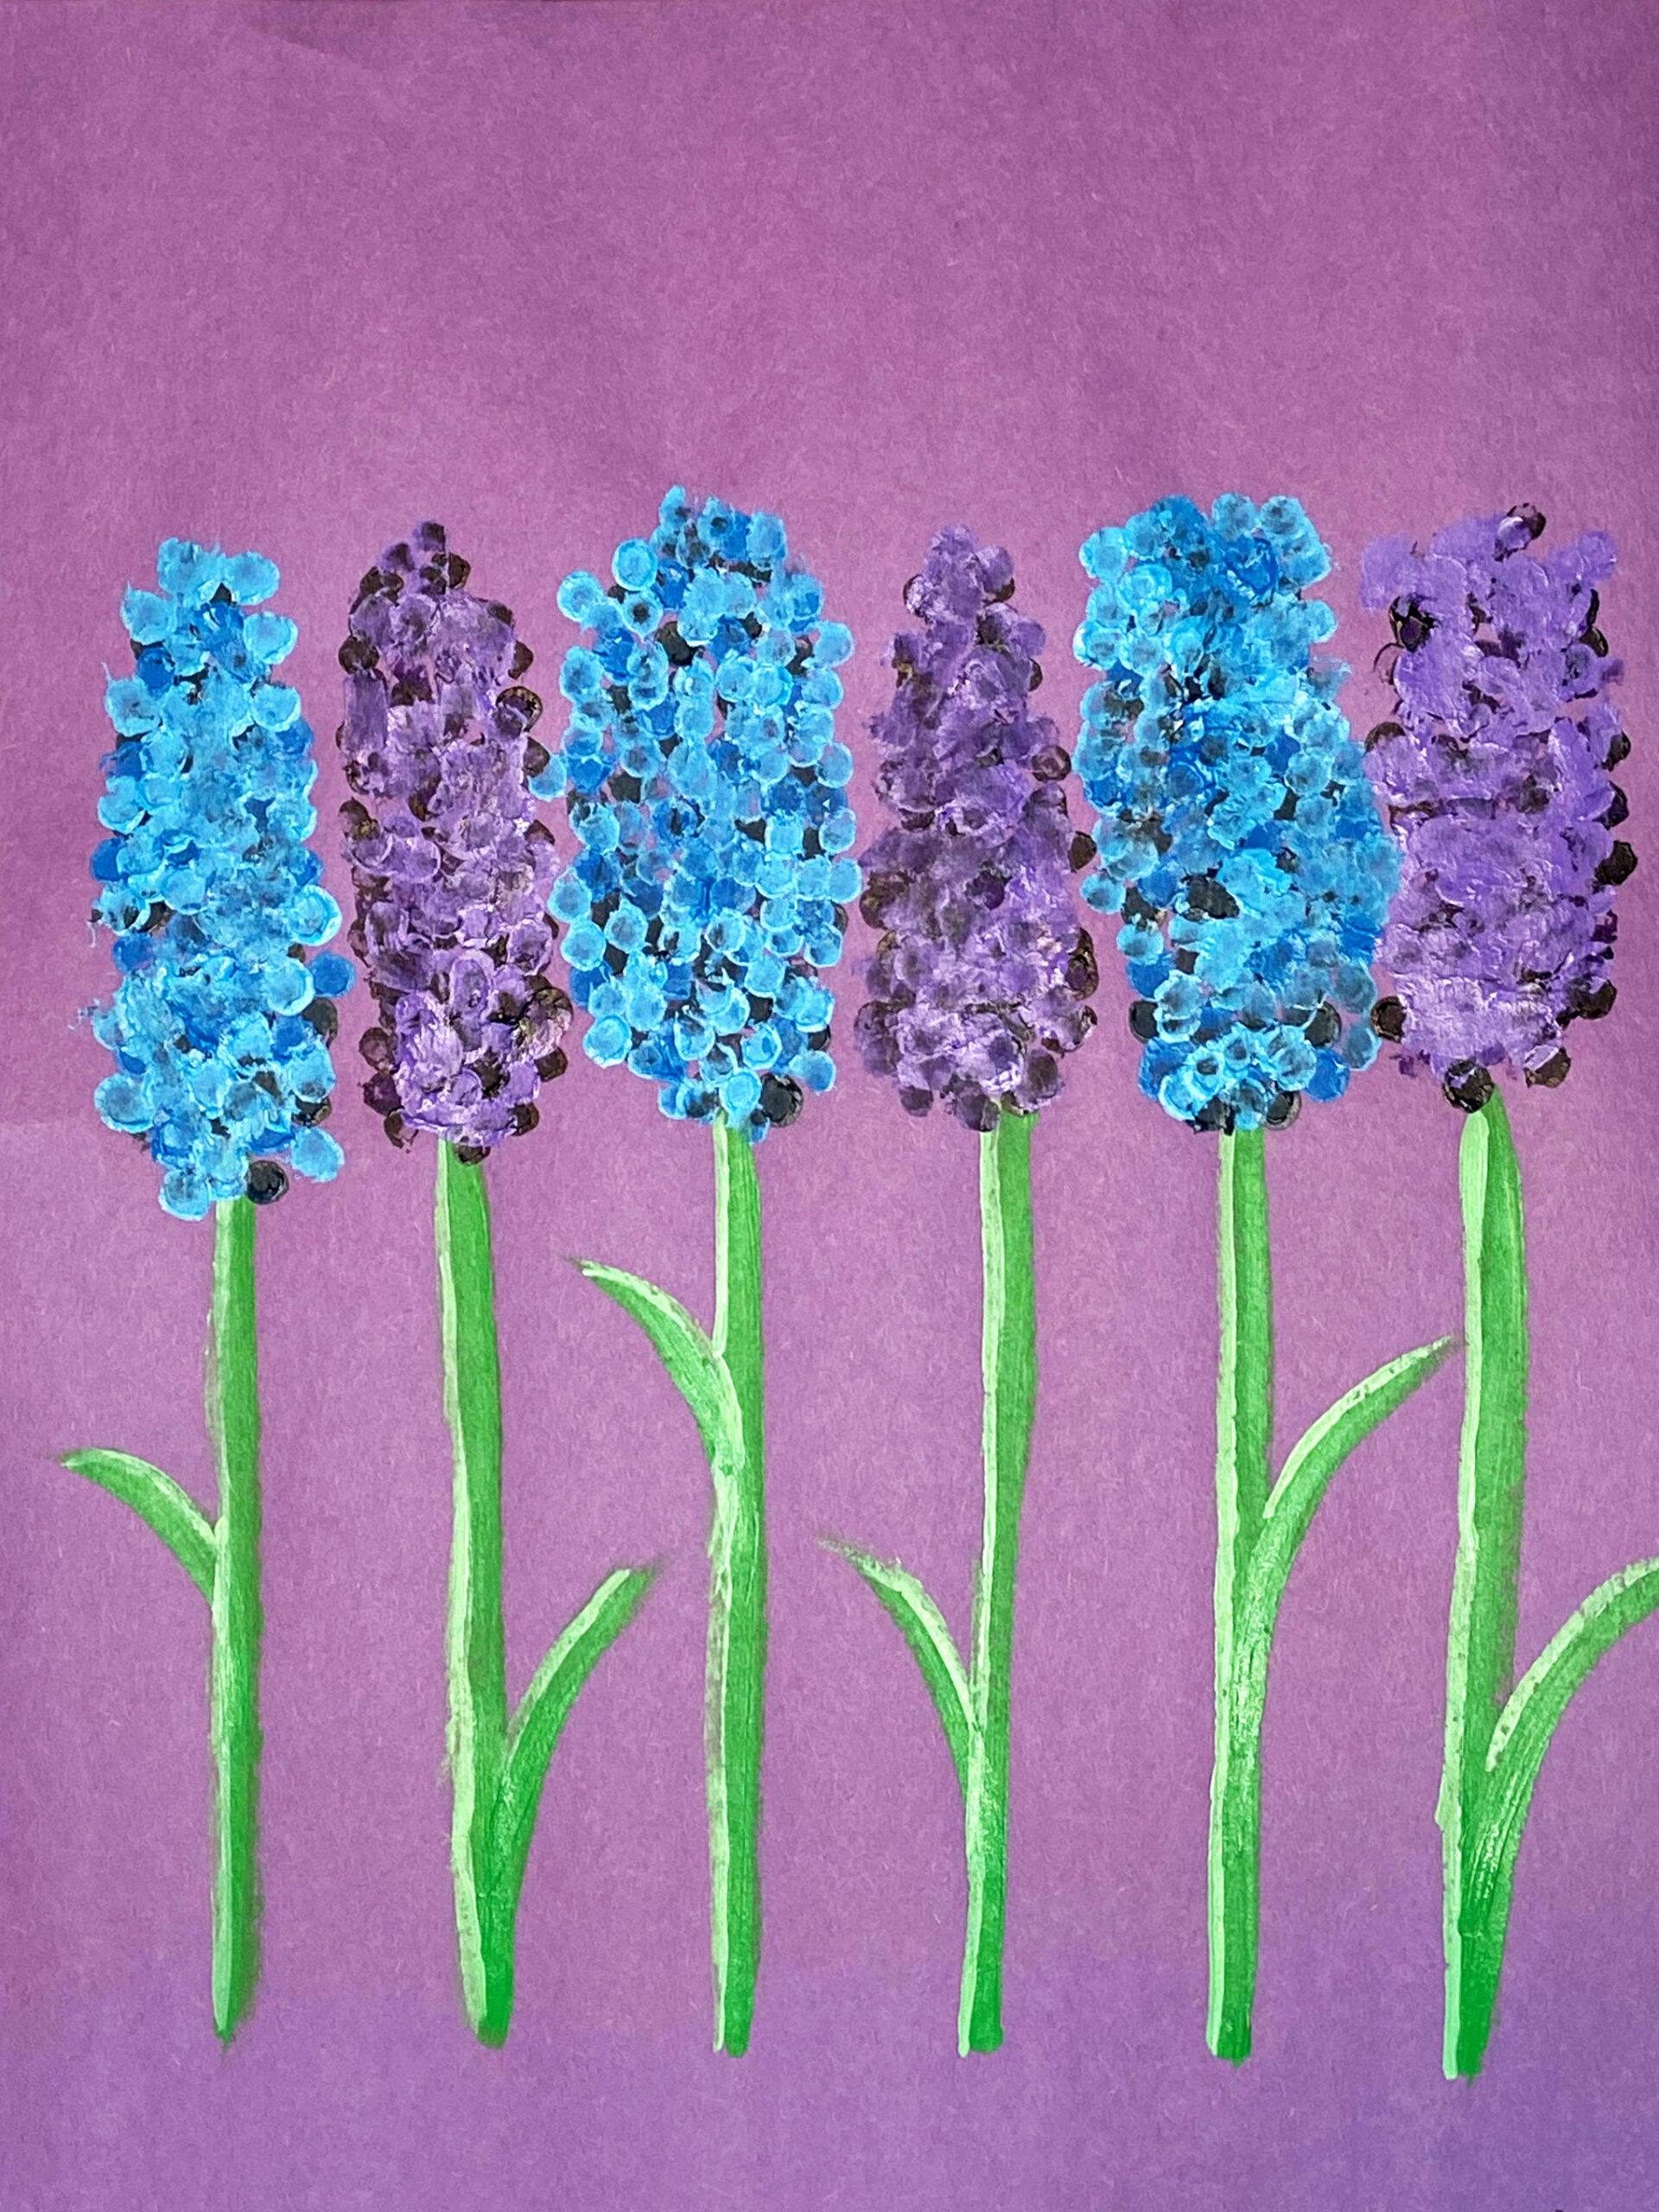
Using your fingers as a guide draw guiding lines (“helper lines”) faintly with pencil on your paper. About half way up your paper, lightly draw a helper line across your whole paper. This is your stem finish line. - Paint hyacinth stems
Using a paint brush and green paint, paint a line starting at a helper dot all the way up to your finish line. It’s ok if your lines aren’t perfectly straight. Make sure you paint one line for each helper dot. Paint one or two leaves per stem, bushing up and away
from the stem in a curved motion. Mix a little green paint with white paint to make a
green tint (or have color mixed ahead of time). Using a paint brush, you paint a smaller thin line along the left side of each green hyacinth stem and leaf. Clean your brush. - Paint hyacinth flowers
Choose a color(s) for your hyacinth flower: pink, purple, or blue. You can use paint brushes to mix our flower paint (or have color mixed ahead of time), but will use cotton swabs to paint the flowers. Mix a shade of our flower color (pink, purple, or blue). Add a little dab of black to our flower paint. Using a cotton swab paint the shade dots in a hotdog shape (round on top, round on bottom, with straight sides). Be sure to overlap your flower on it’s stem. Using the pure color and a new cotton swab, we layer our flower color dots on top of our shade dots. Finally, using a tint of our flower color and a new cotton swab,
layer your tint dots on top of your flower, this creates the highlight giving our flowers more depth. - You’re finished! Don’t forget to sign your painting, and let it dry.
Share this Lesson Plan
Author
Topics
Lesson Plan Rating
Difficulty Level
Mess Potential
Student Satisfaction
Printability