Abstract Color Mixing
Project Objective
To explore color mixing, discuss color families and vocabulary, and create cohesive abstract lines and shapes.
Age Group
Resources
Practice mixing tints and shades. Extend this lesson by including intermediate colors, tones, or various color schemes tailored to your curricular needs.
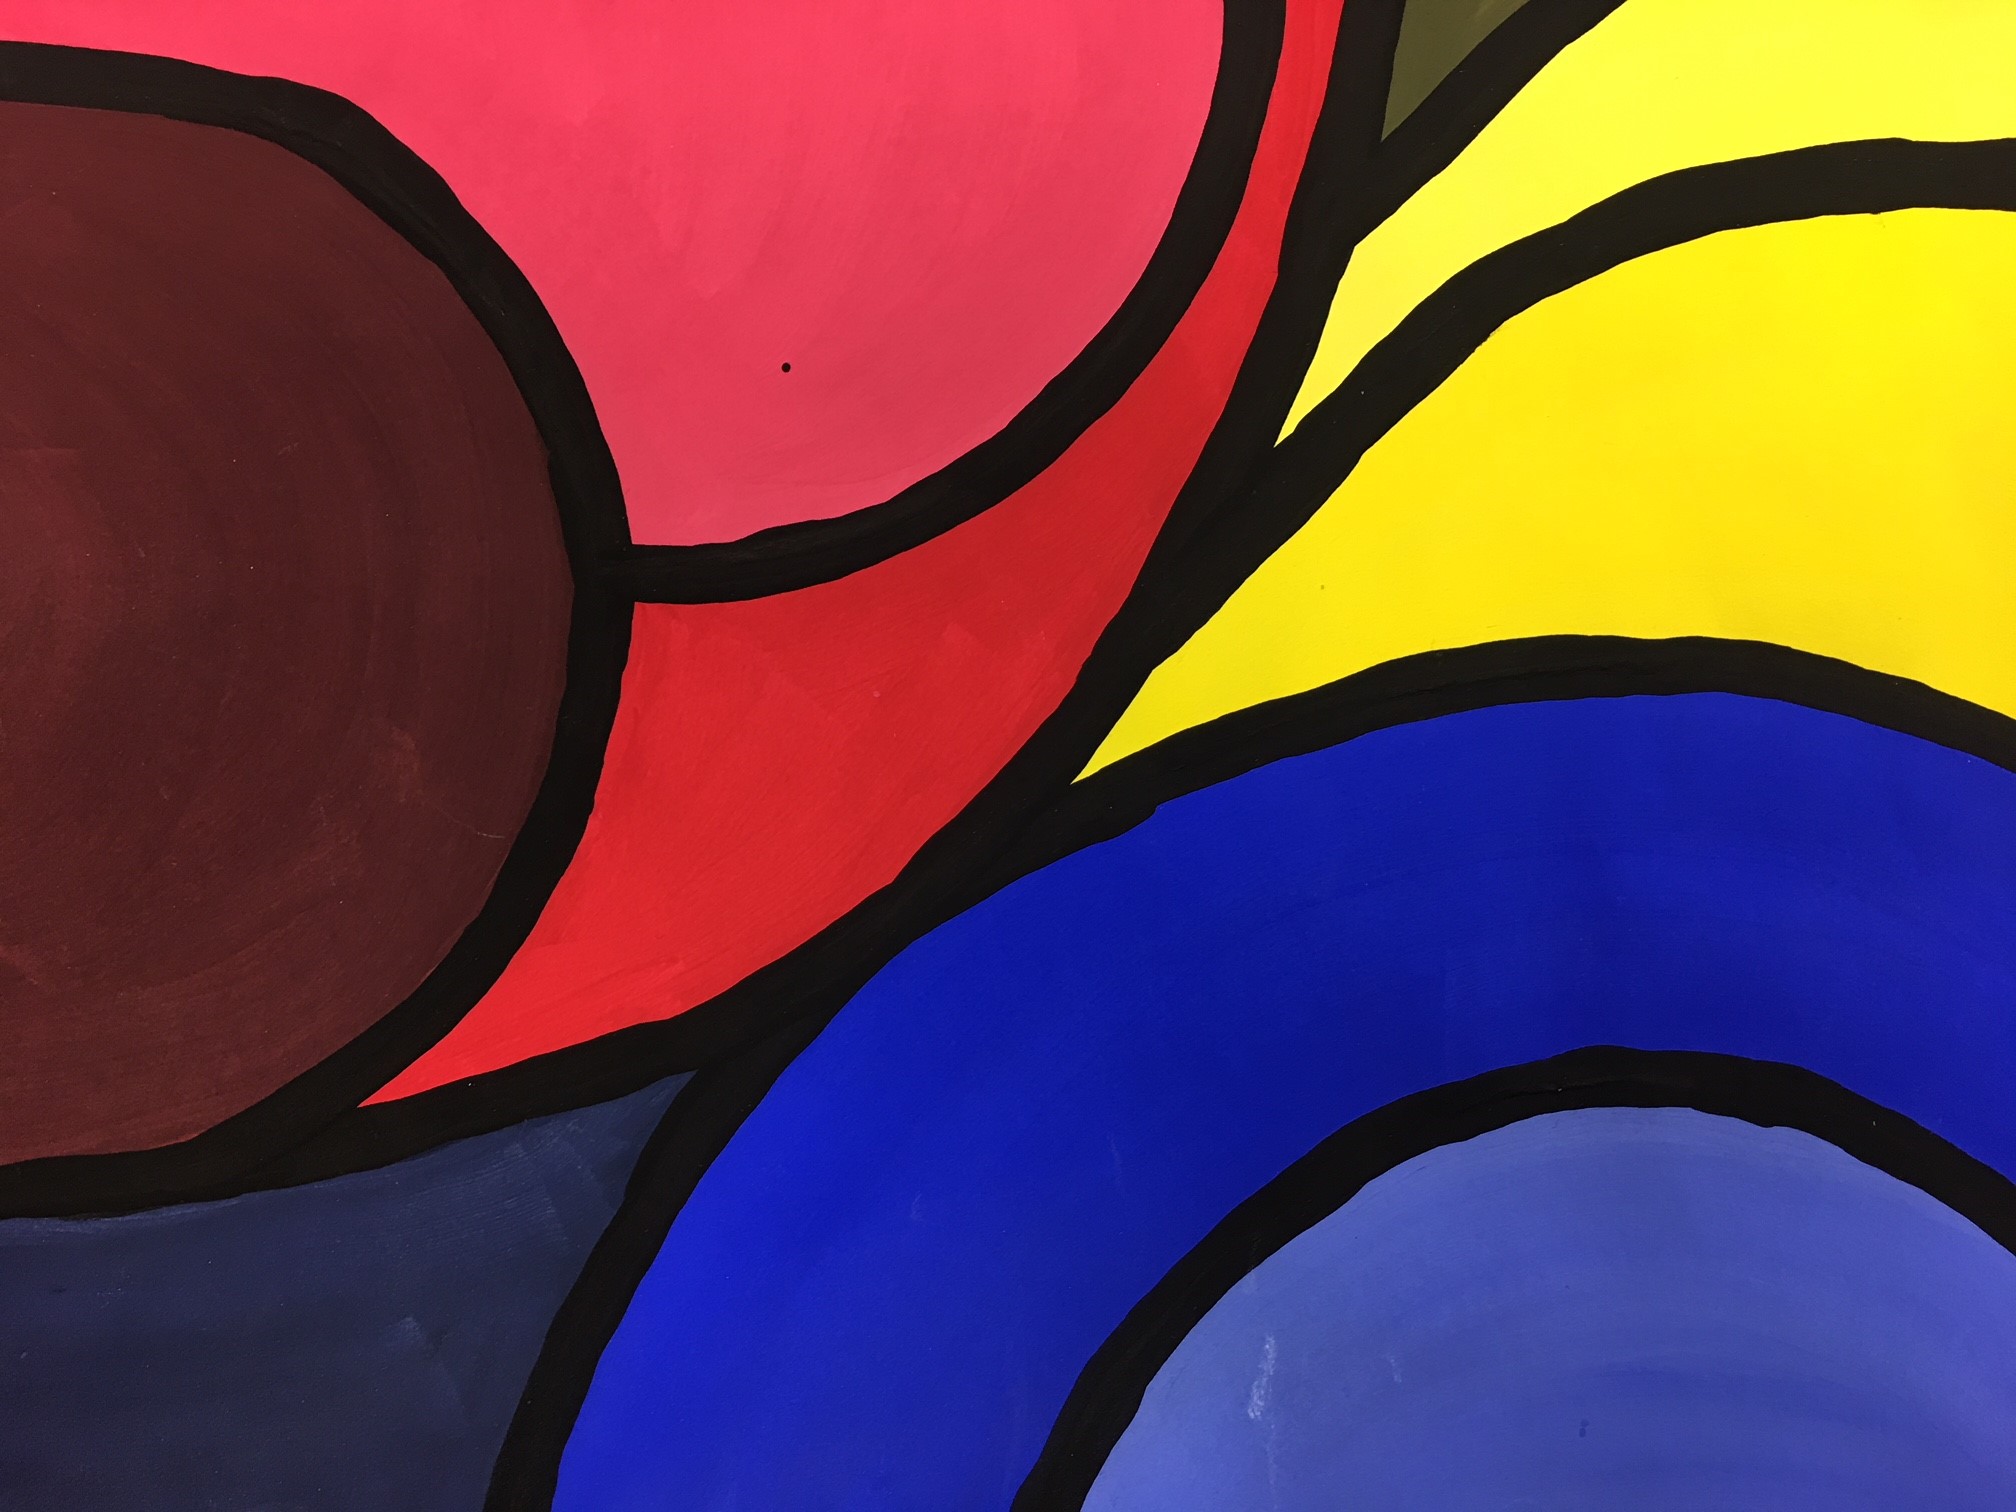
- Determine the total number of colors you will use. For example, if you choose red, yellow and blue, you will need three areas for each of the three primary colors. Use a pencil to create the number of areas you will need on your paper – in this case, three. The paper can be creatively divided as long as it has three areas. Trace over these pencil lines with a colored pencil.
- Divide each of the three areas into three sections. One section will be for the hue, another the tint, and another is for the shade of the color. Do NOT trace over these lines with colored pencil. Label these lightly with regular pencil if needed, but don’t forget to erase before painting!
- Using the liquid tempera paint, students can start mixing and adding color. Encourage students to mix their tints and shades fully before painting each of the sections smoothly and completely. Students should also clean and dry their brushes before mixing and painting each new hue, tint, or shade. Encourage students to fill the page with saturated colors to complete their composition. Let dry.
- Once dry, have students use a small brush and black paint (or a Sharpie) to outline each of the sections. Then, move paintings to the drying rack to dry. Finish with your routine for clean-up!
Share this Lesson Plan
Author
Lesson Plan Rating
Difficulty Level
Mess Potential
Student Satisfaction
Printability